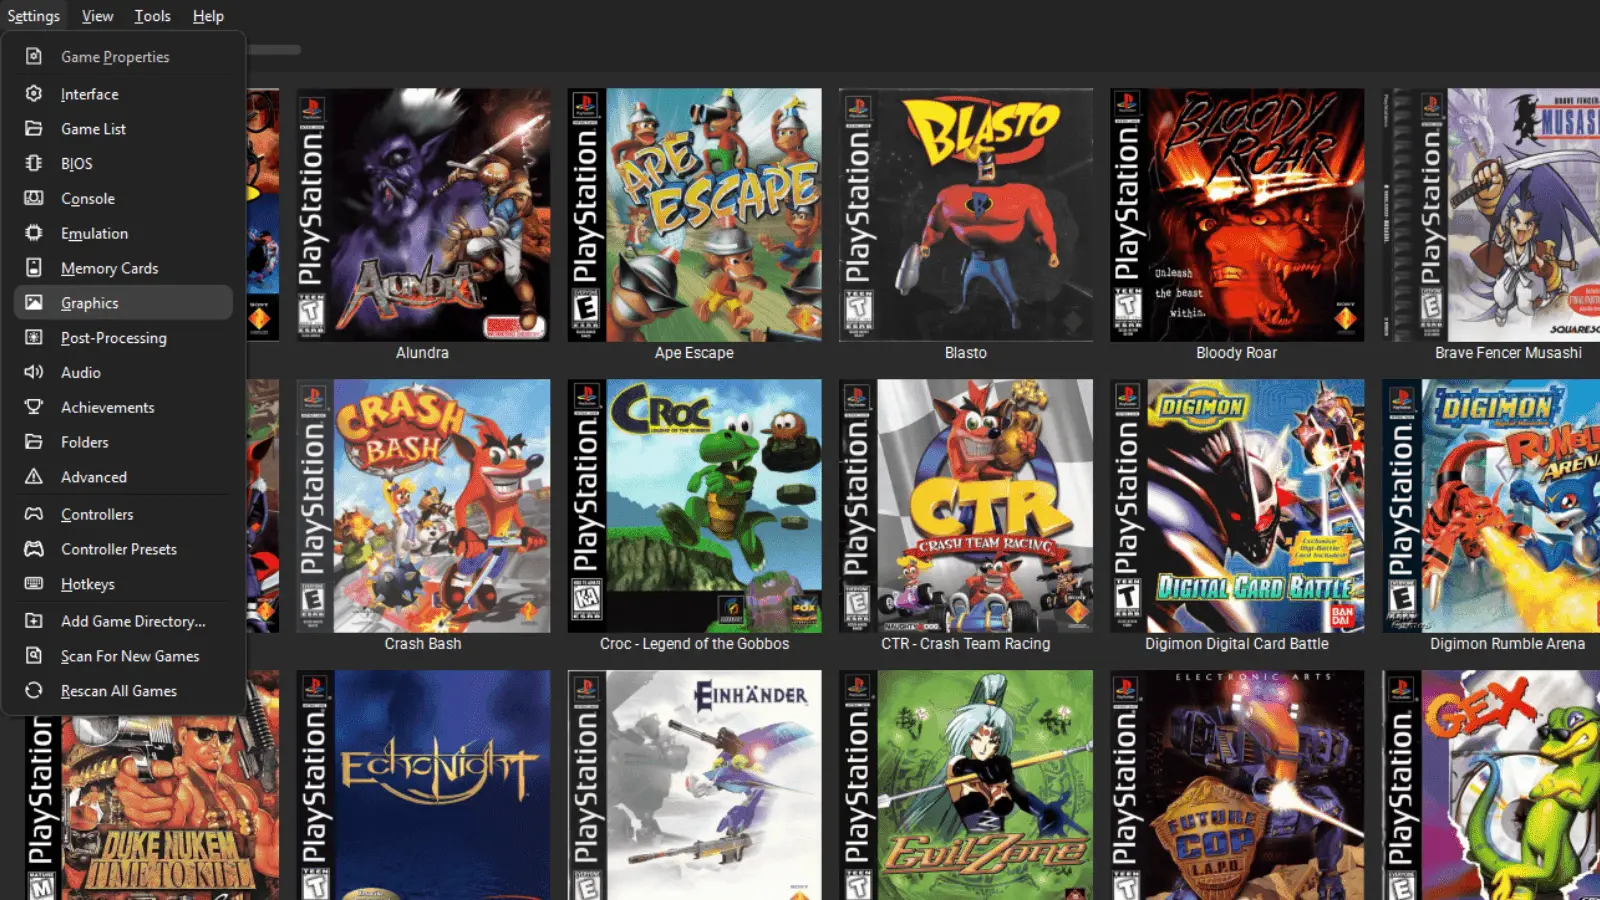
I remember opening DuckStation’s settings menu for the first time and just staring at it. Tabs inside tabs, options referencing other options, and names that sound like they escaped from a GPU engineering handbook.
The good news is that you do not need to understand all of it. The best DuckStation settings for PS1 are mostly a handful of safe choices: leave the renderer on Automatic, raise internal resolution only as far as your hardware comfortably allows, keep the original aspect ratio, use PGXP only if you want cleaner 3D geometry, and leave the riskier enhancement switches alone unless a specific game needs them.
If you would rather watch than read, my five-minute DuckStation graphics settings video covers the essentials. This guide goes deeper and explains what the settings actually do, which ones I recommend, and what to change when something breaks.
Last checked: August 22, 2026. I rechecked this guide against DuckStation’s current source code, built-in setting descriptions, and default values. DuckStation uses rolling releases, so menu placement and wording can move between builds even when the underlying setting still exists.
Before you start: DuckStation requires a PlayStation BIOS image. DuckStation does not provide one and its official documentation tells users to dump the BIOS from a console they own. If you still need the emulator itself configured, start with my DuckStation setup guide before changing graphics options.
Best DuckStation Settings: Quick Setup
If you want a clean modern PS1 image without turning every game into a troubleshooting project, this is the baseline I would start with:
| Setting | Recommended Starting Point | Why |
|---|---|---|
| Renderer | Automatic | Current DuckStation default; lets the emulator choose an appropriate backend for your platform |
| Internal Resolution | 4x on capable modern hardware; 2x-3x on modest hardware; 1x fallback | Sharpens 3D polygons and lines; higher values cost more GPU performance |
| Texture Filtering | Nearest | Preserves the crisp original texture character |
| Sprite Texture Filtering | Nearest | Keeps HUDs and 2D sprites from becoming unnecessarily blurred |
| Dithering | True Color | Current default; removes PS1 dithering and produces cleaner gradients |
| Deinterlacing | Progressive | Current default and usually the cleanest output |
| Aspect Ratio | Auto (Game Native) | Matches how each game was intended to appear on a period TV |
| Crop | Only Overscan | Current default compromise between black borders and game content |
| Threaded Rendering | On | Current default; DuckStation calls it safe and a significant speed improvement |
| PGXP Geometry Correction | Optional | Turn it on if you want less polygon wobble; leave it off for original presentation or if a game misbehaves |
| Perspective Correct Textures | On when using PGXP | Straightens warped textures and is the current PGXP default |
| Culling Correction | On when using PGXP | Improves polygon-culling precision and is the current PGXP default |
| PGXP CPU Mode | Off globally | Can help specific games but has a high performance cost |
| PGXP Depth Buffer | Off globally | Officially marked low compatibility |
| Multi-Sampling | Disabled | DuckStation warns that it often introduces rendering errors |
| Widescreen Rendering | Off globally | May not be compatible with all games |
| Texture Cache / Replacements | Off unless using a pack | Texture cache is experimental and can cause rendering errors |
This is a starting point, not a commandment. DuckStation’s defaults are intentionally conservative, and the emulator also has per-game compatibility data that can disable or adjust enhancements when a title needs special treatment. If a game looks wrong after an enhancement, the enhancement is the first suspect.
There Are Two Good Ways to Use DuckStation
A lot of arguments about the “best” settings are really arguments about what the person wants the PS1 to look like.
- Modernized PS1: higher internal resolution, True Color, PGXP Geometry Correction, perspective-correct textures, original aspect ratio.
- Original-style PS1: 1x or modest resolution scaling, Nearest filtering, PGXP off, native aspect ratio, optional CRT post-processing.
Neither is objectively correct. I usually like cleaner 3D geometry while preserving the original 4:3 framing and texture character. If you prefer the wobble, dithering, and CRT-era presentation, leave more of the enhancements off and use my DuckStation CRT filter comparison instead of trying to turn every PS1 game into a miniature remaster.
DuckStation Rendering Settings
Menu: Settings → Graphics → Rendering
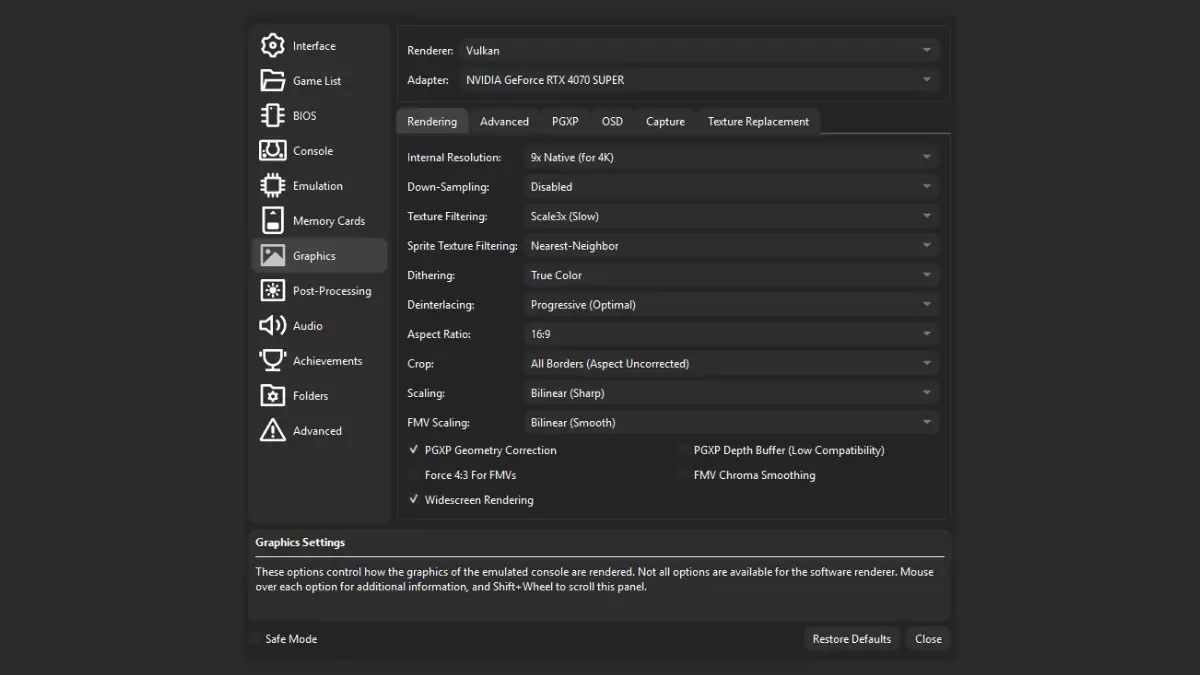
Renderer: Leave It on Automatic
The current DuckStation default is Automatic. That is what I recommend for most people.
DuckStation supports multiple hardware APIs depending on your platform, including Direct3D 11, Direct3D 12, OpenGL, Vulkan, and Metal, plus a software renderer. The software renderer is the compatibility-first option and does not provide the normal hardware enhancements. Automatic saves you from choosing an API simply because one of them has the coolest name.
If you want the backend-by-backend explanation, my DuckStation renderer guide is the better place for it. For this guide, leave Automatic alone unless you are solving a specific renderer problem.
Internal Resolution: 4x Is a Good Modern Starting Point
Internal Resolution increases the resolution used to render 3D polygons and lines. DuckStation officially describes higher values as usually safe, with the main cost being GPU performance.
On a capable modern PC or Android handheld, 4x is a sensible starting point for a sharp 1080p-class display. On weaker hardware, start at 2x or 3x. If the emulator cannot maintain full speed, lower it. The exact multiplier is not a promise that every PS1 game’s output will map perfectly to a specific monitor resolution, because original games used several video modes.
1x is still useful if you want original-resolution rendering, are using a demanding shader chain, or are troubleshooting performance.
Texture and Sprite Filtering: Start With Nearest
Nearest is the current default for both texture and sprite filtering. It keeps texture pixels sharp instead of smoothing them together.
Smoother filters can look pleasant at high internal resolutions, but they also change the visual language of the artwork. For games such as Mega Man Legends, I would start with Nearest and change it only if the chunky texture edges bother you.
Dithering: True Color for the Cleanest Image
DuckStation currently defaults to True Color. According to its own setting description, True Color disables the original dithering pattern and produces cleaner gradients.
If you are chasing a more authentic PS1 presentation, scaled or original-style dithering can be part of the charm. For a clean modern configuration, True Color is the easy choice.
Aspect Ratio: Auto (Game Native)
The current default, Auto (Game Native), is exactly where I would leave it. DuckStation says this automatically adjusts the image to match how a game would normally have appeared on a television of the era.
Most PS1 games are associated with 4:3 presentation, but using the emulator’s Game Native logic is better than forcing one blanket ratio onto everything.
Deinterlacing and Crop: Keep the Defaults First
DuckStation currently defaults to Progressive deinterlacing and Only Overscan cropping. Progressive generally gives the cleanest output, although a small number of games can require interlaced behavior. Only Overscan is the project’s default compromise between hiding television overscan and accidentally cropping game content.
Widescreen Rendering: Leave It Off Globally
Widescreen Rendering changes 3D vertex positions so a game can show a wider field of view. DuckStation explicitly warns that it may not be compatible with all games.
I would never make it part of a universal “best settings” preset. Use it per game if you like the effect. If you do run gameplay wider than 4:3, Force 4:3 for FMVs can snap 24-bit cutscenes back to the original shape so pre-rendered video does not stretch across your monitor.
Best PGXP Settings in DuckStation
Menu: Settings → Graphics → PGXP
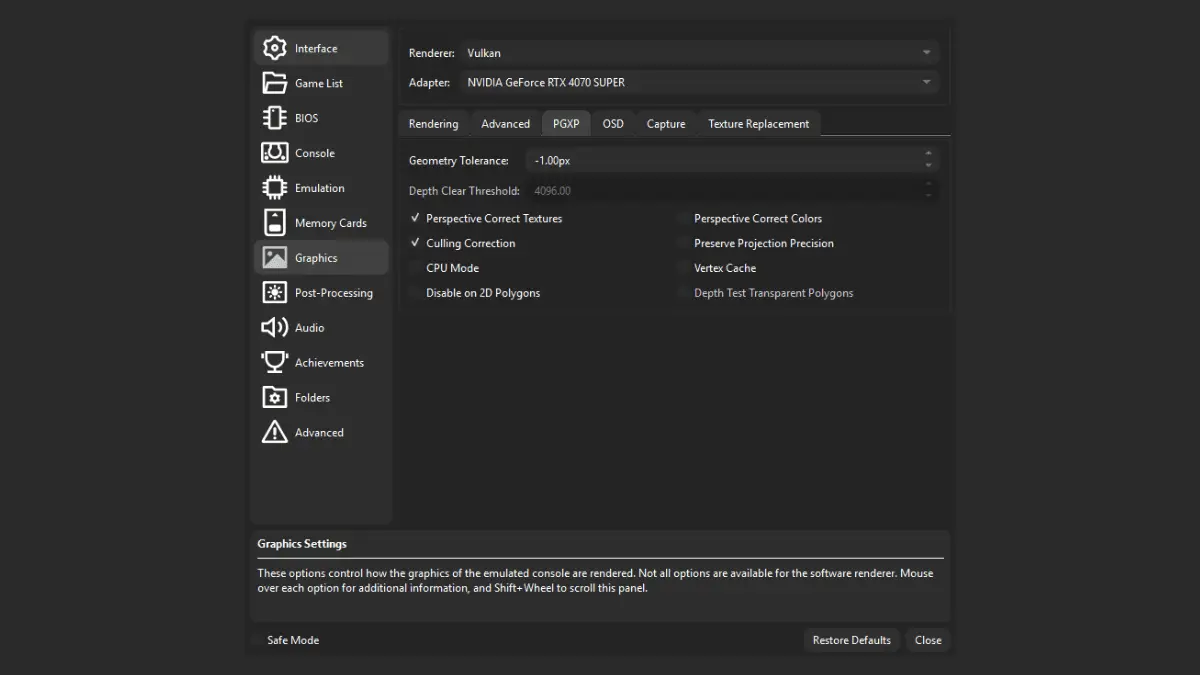
PGXP is the setting family responsible for correcting several visual quirks people associate with PS1 3D. Geometry Correction reduces polygon jitter and texture warping, while other PGXP options build on that extra precision.
PGXP Geometry Correction: Try It Per Game
This is the PGXP switch most people actually want. DuckStation says it reduces wobbly polygons and warping textures, but also warns that it may not be compatible with all games.
For a modernized 3D look, I turn it on. For authenticity, I leave it off. If a particular game develops visual problems, use a per-game configuration and disable PGXP for that title instead of weakening your global setup.
Perspective Correct Textures: On With PGXP
This is checked by default when PGXP is in use. It corrects the perspective interpolation of texture coordinates, which straightens out textures that otherwise appear to slide and warp across polygons.
Culling Correction: Leave It On With PGXP
Culling Correction is also checked by default with PGXP. DuckStation says it increases polygon-culling precision and reduces holes in geometry. Leave it on unless you are diagnosing a specific game problem.
PGXP CPU Mode: Off Unless a Game Needs It
CPU Mode extends PGXP to additional instructions and can fix wobble in games that normal PGXP misses. DuckStation also labels it as having a high performance cost. That makes it a compatibility tool, not a global quality toggle.
PGXP Vertex Cache: Usually Leave It Off
DuckStation says Vertex Cache can improve PGXP compatibility for some titles but generally provides no benefit. Leave it off unless a game-specific fix tells you otherwise.
PGXP Depth Buffer: Low Compatibility Means What It Says
The Depth Buffer attempts to reduce polygon Z-fighting using PGXP depth data. The current DuckStation tooltip calls it low compatibility, while noting that it can work well in some games and that others may require threshold adjustments.
That is why my global recommendation is still Off. If a particular game has distracting Z-fighting, experiment with it inside that game’s own settings rather than flipping it on for the whole library.
DuckStation Advanced Graphics Settings
Menu: Settings → Graphics → Advanced
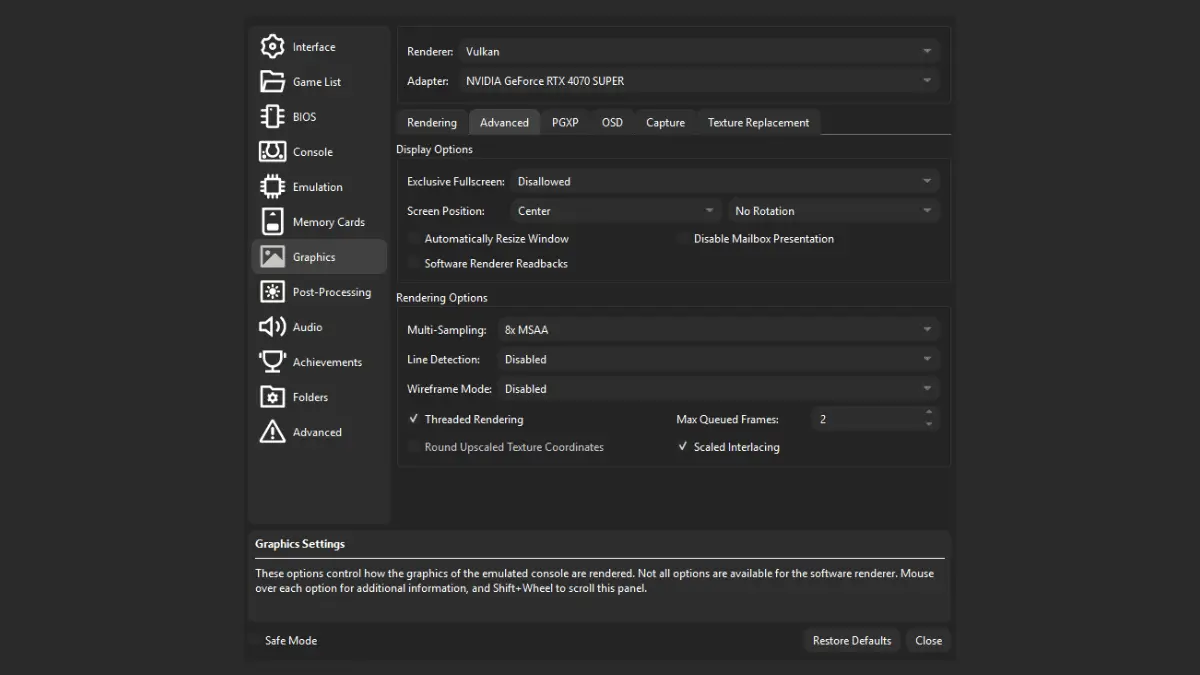
Multi-Sampling: Disabled
Multi-Sampling can smooth polygon edges, but DuckStation’s current tooltip explicitly warns that it often introduces rendering errors. That is a much better reason to leave it disabled than the vague internet rule that “MSAA always breaks PS1 games.”
If you want cleaner 3D, increase Internal Resolution first. It is the safer enhancement.
Threaded Rendering: Leave It On
Threaded Rendering is enabled by default. DuckStation describes it as using a second thread for graphics, providing a significant speed improvement, particularly with the software renderer, and says it is safe to use.
Max Queued Frames: Keep the Default
Current defaults are 2 frames on desktop and 3 on Android. I would not turn this into another latency science project unless you are solving a real frame-pacing or input problem. The defaults exist for a reason.
Use Blit Swap Chain: Only for a Specific Windows/D3D11 Problem
This setting is Windows-specific and applies to the Direct3D 11 renderer. DuckStation says it uses a slower blit presentation model that may be required by some streaming applications or to uncap frame rates on some systems.
Do not enable it just because you use OBS. Try normal capture first. This is a troubleshooting switch for cases where the normal presentation path is the problem.
Texture Replacement Settings
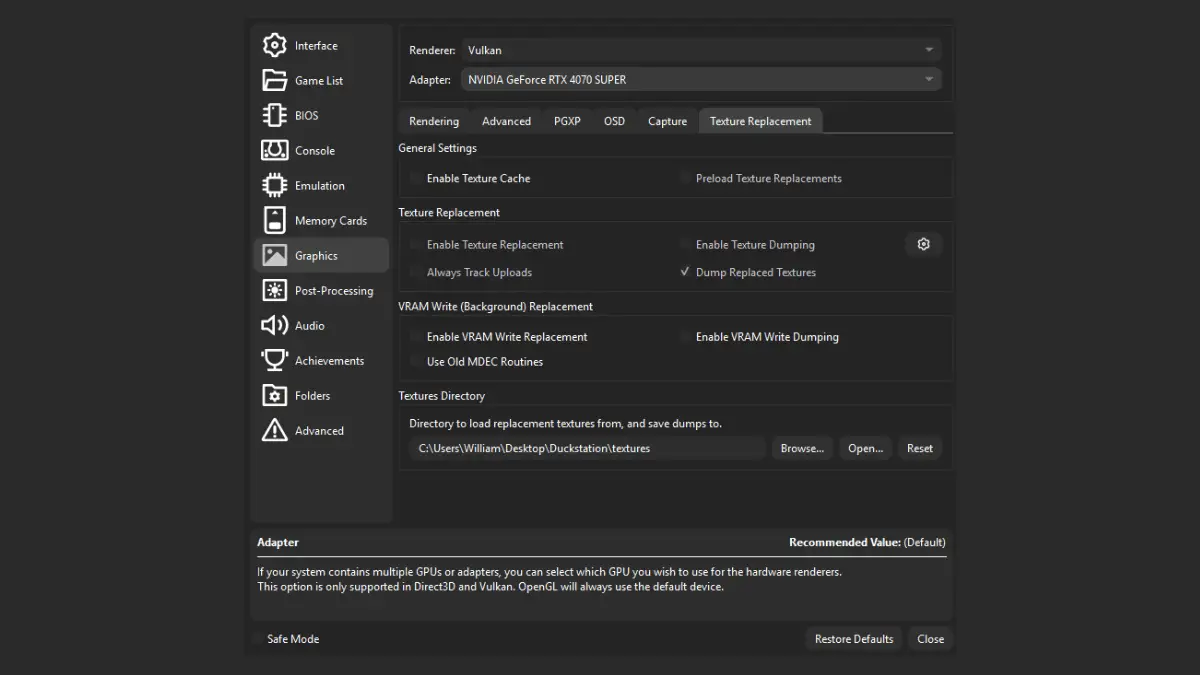
Texture replacements are for community-made high-resolution texture packs. They are impressive when a pack is built well, but they do not belong in a general baseline configuration.
- Enable Texture Cache: Off unless you need replacements. DuckStation calls the cache experimental and says it may cause rendering errors in some games.
- Enable Texture Replacements: Off until you have a pack. DuckStation says replacements are not compatible with all games.
- Preload Texture Replacements: Off by default. If you are using a compatible pack and get runtime stutter, this loads the replacement textures into RAM up front.
If a game develops rendering problems while replacements are active, disable the replacement system before changing unrelated graphics settings. Debug one variable at a time or the settings menu becomes a haunted house.
On-Screen Display: How to Tell if DuckStation Is Actually Running Slowly
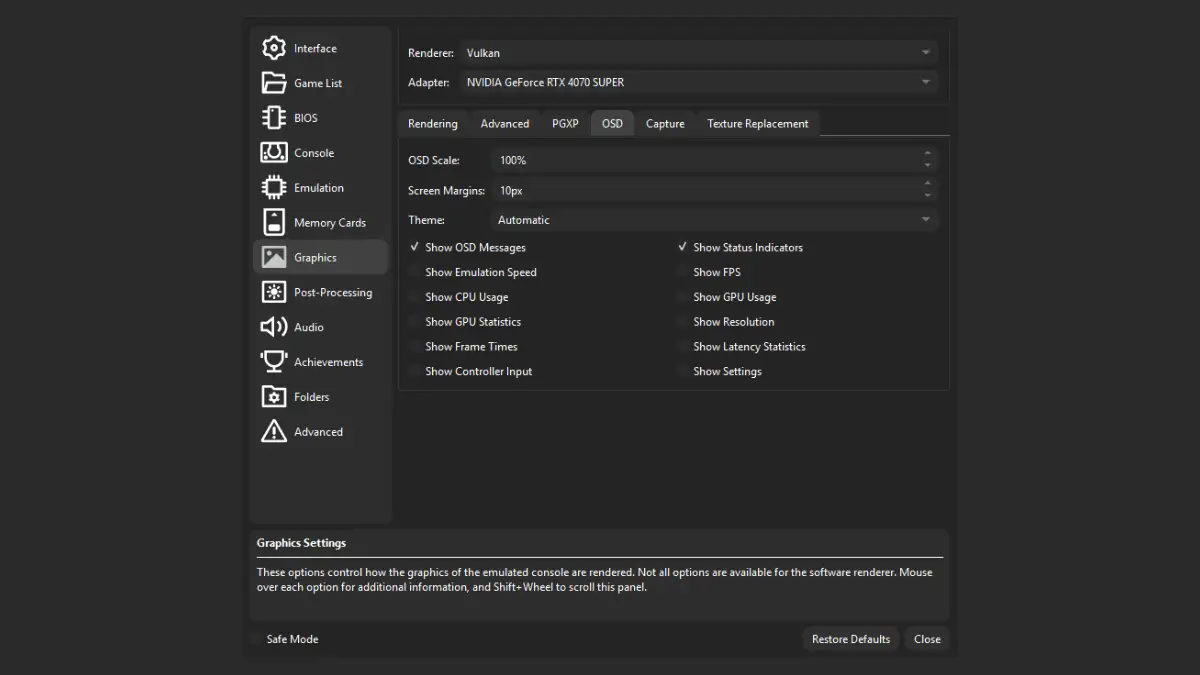
This section needed the biggest factual correction from my March version.
A PS1 game showing 30 FPS is not automatically running slowly. Many PlayStation games intentionally render new frames at 30 FPS, 20 FPS, 15 FPS, or other rates while the console itself continues running at normal speed. NTSC and PAL video timing are roughly 60Hz and 50Hz, but that does not mean every game renders 60 or 50 unique gameplay frames each second.
For performance troubleshooting, Show Emulation Speed is the more useful first indicator. Around 100% means the emulator is keeping up with the intended console speed. FPS is still useful for understanding what the game itself is outputting or noticing sudden drops from its normal behavior, but do not lower settings simply because a 30 FPS PS1 game says “30.”
- Show FPS: Off normally; useful for inspecting the game’s rendered frame rate.
- Show Emulation Speed: Off normally; turn it on when diagnosing slowdowns or speed problems.
- Show Messages: Leave on unless notifications annoy you.
- Show Status Indicators: Leave on. They make it obvious when pause, rewind, fast-forward, or another mode is active.
Post-Processing and CRT Shaders
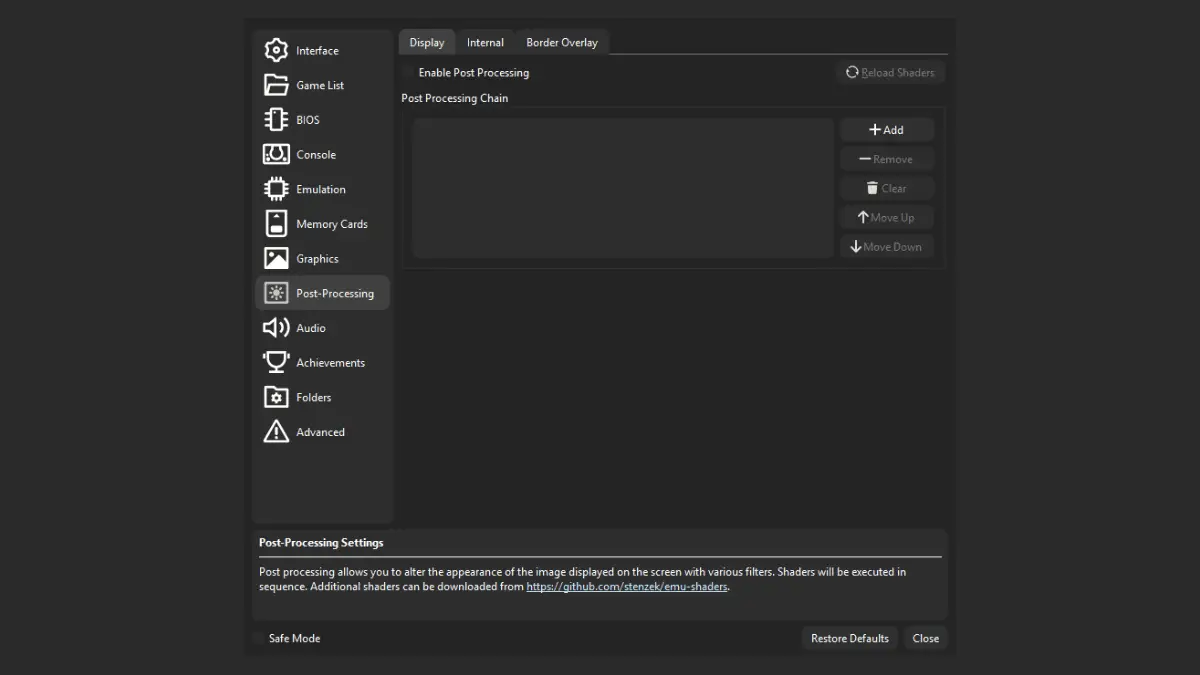
Post-processing applies shader effects after or during the rendering pipeline depending on the chain you choose. This is where CRT-style scanlines, color treatments, and other visual effects come into play.
There is no single objectively best CRT filter because the right answer depends on your display and the look you want. I tested several in my DuckStation CRT filter comparison, so I would keep this guide focused on emulator settings rather than repeating that entire rabbit hole here.
Shaders do use GPU resources. If a game loses emulation speed after you build a giant shader chain, remove the post-processing first and test again.
DuckStation Troubleshooting
DuckStation Says No BIOS Was Found
Open Settings → BIOS and make sure DuckStation can see a valid BIOS image. Current setup builds also include an option to install/select a BIOS during the setup wizard. DuckStation does not supply BIOS ROMs and instructs users to dump one from their own console.
My Controller Is Not Being Recognized
Open Settings → Controllers, select the appropriate controller port, and try Automatic Mapping first. DuckStation’s documentation says automatic mapping handles the majority of controllers. If that fails, map the controls manually and then check whether another program is intercepting the device.
Audio Is Crackling or Skipping
First turn on Show Emulation Speed. If the emulator is below 100%, remove expensive enhancements such as high internal resolution, PGXP CPU Mode, or heavy shader chains until full speed returns. If emulation speed is healthy, then investigate the audio backend/buffer and host audio setup rather than assuming graphics performance is the cause.
The Game Looks Stretched
Set Aspect Ratio back to Auto (Game Native). If gameplay is intentionally widescreen but FMVs stretch, try Force 4:3 for FMVs.
I Changed Too Many Settings and Everything Is Broken
Use the Restore Defaults button in DuckStation’s main Settings window. The current Qt interface exposes Restore Defaults in the settings-window footer. After resetting, launch the game before adding enhancements back one at a time.
The Game Broke After I Enabled PGXP
Turn off PGXP Depth Buffer first if you enabled it. It is explicitly marked low compatibility. If problems remain, disable PGXP Geometry Correction for that game and let DuckStation use the original geometry behavior.
Multi-Sampling Caused Missing or Broken Graphics
Disable it. DuckStation’s own setting description warns that Multi-Sampling often introduces rendering errors. Use higher Internal Resolution for safer image cleanup.
The Game Became Slow After I Made It Look Better
Check Emulation Speed, then lower Internal Resolution. Turn off PGXP CPU Mode, PGXP Depth Buffer, texture replacement extras, and post-processing chains. Once you are back at full speed, add enhancements one at a time.
Three DuckStation Starter Configs
1. Safest Compatibility Setup
- Renderer: Automatic
- Internal Resolution: 1x
- Texture Filtering: Nearest
- Aspect Ratio: Auto (Game Native)
- Threaded Rendering: On
- PGXP Geometry Correction: Off
- PGXP Depth Buffer: Off
- Multi-Sampling: Disabled
- Texture Cache/Replacements: Off
- Post-Processing: Off
Use this when you want to establish that the game itself works before adding visual extras.
2. Clean Modern 3D Setup
- Renderer: Automatic
- Internal Resolution: 4x as a capable-hardware starting point
- Texture Filtering: Nearest
- Sprite Texture Filtering: Nearest
- Dithering: True Color
- Aspect Ratio: Auto (Game Native)
- Crop: Only Overscan
- Threaded Rendering: On
- PGXP Geometry Correction: On
- Perspective Correct Textures: On
- Culling Correction: On
- PGXP CPU Mode: Off
- PGXP Depth Buffer: Off
- Multi-Sampling: Disabled
- Widescreen Rendering: Off
This is the setup I would start from if your goal is “make PS1 3D look cleaner without rewriting the game.”
3. Low-Power / Something Is Slow Setup
- Renderer: Automatic
- Internal Resolution: 1x
- Threaded Rendering: On
- PGXP CPU Mode: Off
- PGXP Depth Buffer: Off
- Multi-Sampling: Disabled
- Post-Processing: Off
- Texture Replacements: Off
Check Emulation Speed. Once it is holding 100%, add visual upgrades back one at a time.
DuckStation Settings FAQ
What are the best DuckStation settings for most PS1 games?
Start with Renderer on Automatic, native aspect ratio, Nearest filtering, True Color dithering, Threaded Rendering on, Multi-Sampling off, PGXP Depth Buffer off, and Texture Replacements off. Raise Internal Resolution according to your GPU. Enable PGXP Geometry Correction only if you want the cleaner 3D look and the game behaves correctly with it.
Should I use Vulkan or Automatic in DuckStation?
Use Automatic unless you have a reason to force a backend. Automatic is DuckStation’s current default. Vulkan is one supported hardware renderer, not the universal default for every platform.
Should PGXP be on or off?
PGXP Geometry Correction is optional. Turn it on if you want less polygon wobble and more stable perspective-correct textures. Leave it off if you want the original PS1 presentation or a game develops compatibility problems.
What internal resolution should I use for 1080p?
4x is a good practical starting point on capable hardware, but PS1 games use multiple source resolutions, so there is no single multiplier that maps perfectly to every 1080p display situation. If 4x is slow, use 3x or 2x. If your GPU has plenty of headroom, you can go higher.
Why is my PS1 game only running at 30 FPS?
Because many PS1 games were designed to render at 30 FPS or lower. A 30 FPS reading does not automatically mean DuckStation is running at half speed. Check Emulation Speed; if it is around 100%, the emulator can be running correctly even while the game renders fewer unique frames.
Should I enable DuckStation widescreen rendering?
Only per game if you prefer it. DuckStation warns that Widescreen Rendering may not be compatible with every title, so I do not recommend enabling it globally.
The Short Version
Automatic renderer. Native aspect ratio. Threaded Rendering on. Riskier enhancements off by default.
Raise Internal Resolution until the image is as sharp as you want without losing emulation speed. Turn on PGXP Geometry Correction if you dislike PS1 wobble. Keep Perspective Correct Textures and Culling Correction with it. Leave PGXP Depth Buffer, CPU Mode, Multi-Sampling, widescreen rendering, and texture replacement features alone until you have a specific reason to use them.
Most importantly, do not assume a game is running badly because the FPS counter says 30. Check Emulation Speed. Sometimes the weird number on screen is not a performance problem. It is just 1997 doing exactly what 1997 did.
If you still need to choose hardware for this setup, my PS1 handheld buying guide now separates cheap PS1-first devices from the much more expensive Android and PC handhelds that can push DuckStation enhancements harder.
Source note: This guide was rechecked against the current DuckStation project source and built-in setting descriptions on August 22, 2026. DuckStation is under active development, so labels and menu placement can change between rolling releases.